Setting up Check Point Remote Access VPN two-factor authentication
General information
This article describes how to configure Check Point to connect to Remote Access VPN with two-factor authentication.
Possible authentication methods:
MultiFactor Mobile ApplicationSMSHardware OTP tokensOTP applications: Google Authenticator or Yandex.KeyTelegram
To configure the second factor of authentication, you will need to install and configure the MultiFactor Radius Adapter.
might be useful
The second factor can be configured in dialogue mode with the user.
Video presentation
Scheme of work
- The user connects to the VPN, enters the login and password in the Remote Access client;
- Check Point NGFW connects to the MultiFactor Radius Adapter component via the RADIUS protocol;
- The Check Point NGFW component checks the user’s login and password in Active Directory or Network Policy Server and requests a second factor of authentication;
- The user confirms the access request on the phone or enters a one-time code in the Remote Access VPN client (Endpoint Security/MAB).
Configuring Check Point NGFW
Launch the SmartConsole management console.
Setting up a RADIUS server
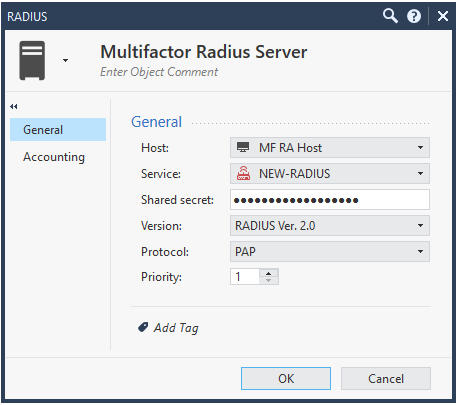
You need to create a new Radius server object.
- On the right side, in the objects section, select New > Server > More > RADIUS and make the following settings:
- Name: Multifactor Radius Server;
- Host: address of the MultiFactor Radius Adapter component (create a new object or select an existing one);
- Service: NEW-RADIUS (port 1812);
- Shared Secret: from the component settings;
- Verison: RADIUS Ver. 2.0;
- Authentication method: PAP.
Setting up Remote Access VPN in Check Point
- Open the Check Point Security Gateway object settings, Mobile Access -> Authentication section. Open Settings:
- Allow newer clients that supports Multiple Login Options to use this authentication method: yes;
- Authentication method: RADIUS;
- Server: Multifactor Radius Server.
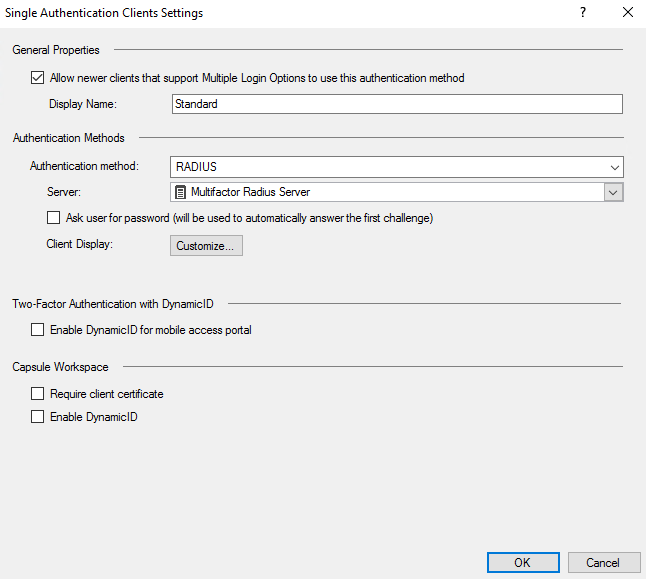
- Repeat the setup for VPN Clients -> Authentication. As a result, the configuration in both sections should look like this:

Setting up a user group
On the right side, in the objects section, select New > More > User > Access Role. Set parameters for the new object and specify the source of user data.
Setting up access policy
Under Security policies > Policy > create a new policy for Remote Access VPN user access to the internal network:
* Source: <Created early Access Role>
* VPN: RemoteAccess
Configuring the RADIUS server timeout
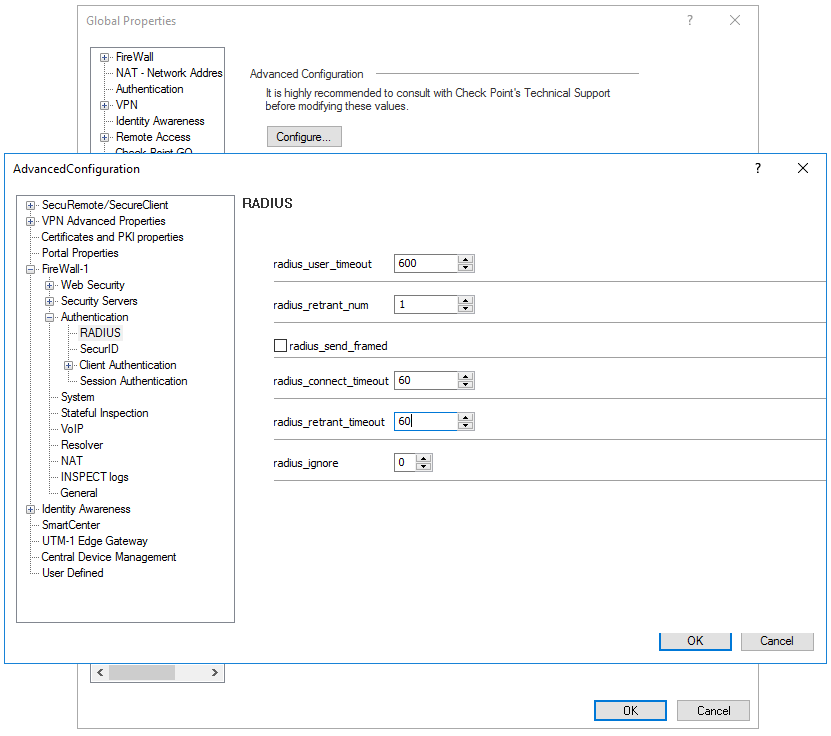
- Click on the icon in the upper left corner, select Global Properties -> Advanced -> Configure -> FireWall-1 -> Authentication -> RADIUS
- Increase radius_retrant_timeout to 60 seconds.
See also: