Configure two-factor authentication on the CentOS server
This article shows how to set up two-factor authentication for CentOS SSH terminal connections with one-time access codes (OTP) or PUSH notifications.
Typically, a private key stored on the client-side is used to authorize connections to the SSH terminal.
This configuration implements only one factor of authentication and is as vulnerable as the access to the client device is. Besides, the keys are often sent over insecure channels, residing in insecure networks or cloud folders.
Second-factor authentication reduces the risk of unauthorized access by 99% and does not complicate the connection process for your users at all.
Available authentication methods:
SMSHardware OTP tokensOTP applications: Google Authenticator or Yandex. KeyTelegramMobile application (soon)
Operation Principle
- SSHD uses the
pam_radiusmodule for second-factor authentication. - The module connects to the Multifactor via RADIUS protocol.
- Multifactor sends a one-time code or PUSH notification to the user to verify the access request.
- The user enters a one-time code or confirms PUSH notification and connects to the terminal.
Before we get started
Don't close the current ssh session until you're sure configuration is working.
Multifactor Configuration
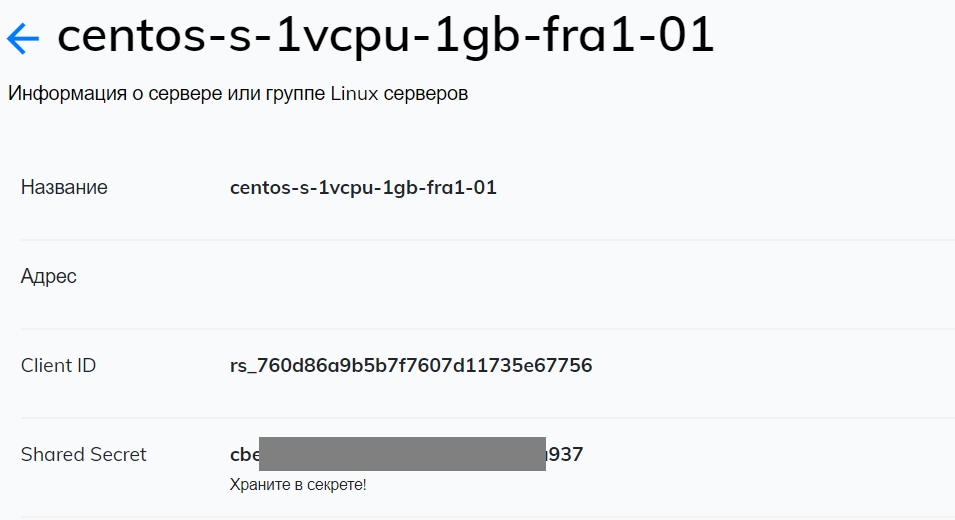
- Go to Multifactor Management System, then to "Resources" and create a new Linux server. Once created, you will have two options: Client ID and Shared Secret, you will need them for the next steps.
- In the "Groups" section, go to the "All users" group settings and remove the "All resources" flag so that only users of a certain group can connect to Linux servers.
- Create a new group "Linux users", select the available authentication methods and specify that users have access to the created Linux server resource.

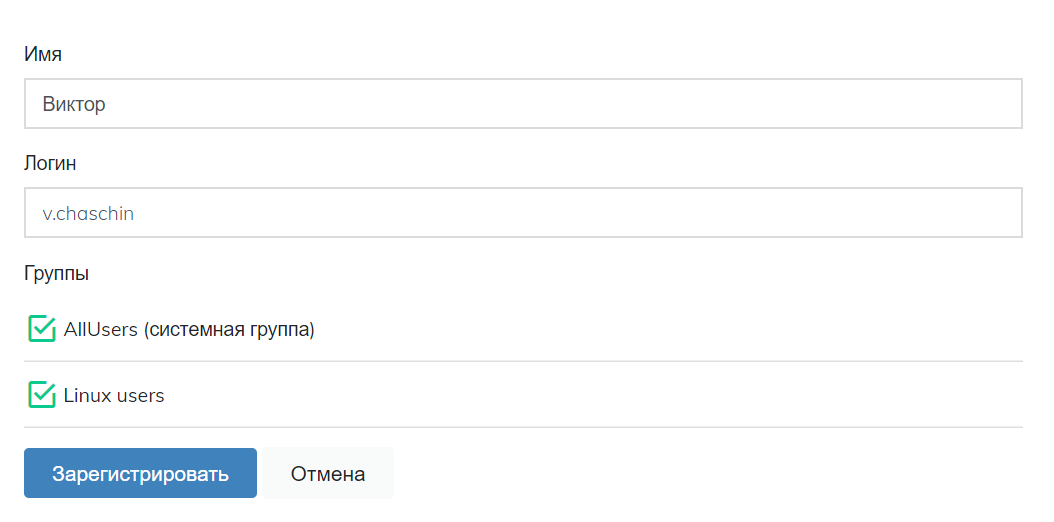
- In the "Users" section create users who will have access to Linux servers, add to the group "Linux users". The login of the user must match the login on the Linux server.
- Send users a link to their email to configure the second authentication factor.

Installing and configuring the PAM_RADIUS module
$ sudo yum -y install epel-release
$ sudo yum -y install pam_radius
Next, create a configuration file
$ sudo vi /etc/pam_radius_ssh.conf
Enter the RADIUS settings of the Multifactor server into it, save and close the editor (:x)
radius.multifactor.ru SHARED_SECRET 40
where:
- radius.multifactor.ru: server address
- SHARED_SECRET: copy from the corresponding parameter [Linux resource settings](#multifactor configuration) Multifactor
- 40: timeout of request waiting with reserve
The file contains a secret key, so set read access rights to it only for user root
$ sudo chmod 0600 /etc/pam_radius_ssh.conf
Setting up PAM modules ssh
Open the file /etc/pam.d/sshd for editing.
$ sudo vi /etc/pam.d/sshd
In the file, comment the line auth substack password-auth and add the following setting at the end:
auth required pam_radius_auth.so skip_passwd client_id=[CLIENT ID] conf=/etc/pam_radius_ssh.conf
where
- CLIENT ID: Copy the multifactor from the corresponding [Linux Resource Settings](#multifactor configuration).
Save and close the file (:x). In the end it should look like this:
#%PAM-1.0
auth required pam_sepermit.so
#auth substack password-auth
auth include postlogin
# Used with polkit to reauthorize users in remote sessions
-auth optional pam_reauthorize.so prepare
account required pam_nologin.so
account include password-auth
password include password-auth
# pam_selinux.so close should be the first session rule
session required pam_selinux.so close
session required pam_loginuid.so
# pam_selinux.so open should only be followed by sessions to be executed in the user context
session required pam_selinux.so open env_params
session required pam_namespace.so
session optional pam_keyinit.so force revoke
session include password-auth
session include postlogin
# Used with polkit to reauthorize users in remote sessions
-session optional pam_reauthorize.so prepare
auth required pam_radius_auth.so skip_passwd client_id=rs_760d86a9b5b7f7607d11735e67757 conf=/etc/pam_radius_ssh.conf
Setting up the SSHD service
Edit the file /etc/ssh/sshd_config.
$ sudo vi /etc/ssh/sshd_config
- Switch on the PAM interface ``shell ChallengeResponseAuthentication yes
2. Add authentication methods
``shell
AuthenticationMethods publickey,keyboard-interactive:pam
Save the file (:x) and restart the ssh demon ``shell $ sudo systemctl restart sshd
## Checking
> Without closing the current session, connect a new one.
* If a confirmation method with one-time password is selected, it will be requested from the user in the terminal:

* If Telegram is selected, the bot will send a message asking for access confirmation:
<img src="/img/linux/multifactor-telegram-request.png" style="width:400px"/>
One button allows access, the other blocks.
## If something's not working
Make sure you don't miss anything:
* The Linux server has a user with a specified login
* The server can access radius.multifactor.ru on UDP port 1812.
* Client ID and Shared Secret parameters are specified correctly
* The Multifactor system has a user with the same login and he is granted access to the Linux users group
* The user has configured the authentication method
* Check the "Access requests" log in <a href="/login" target="blank">"multifactor".
If nothing works, please contact us, we will help you.
See also:
* <a href="https://www.digitalocean.com/community/tutorials/how-to-set-up-ssh-keys-on-centos7-ru" target="_blank">Configuration of SSH keys in CentOS 7</a>.